TOP NEWS

Welcome to I Scream Kitchen! This is a blog to inspire you to try new dishes and make your cooking experience a pinch more fun!

Thursday 21 March 2013

The Real Mushroom Risotto


I love risotto but for a long time I was a little apprehensive to try making it at home as for the real good risotto you need to stir a lot. Whatever people tell you, whatever cut-corners tips they give you, the real deal actually requires that much stirring. I tried loads of that advice but it just couldn’t compare to this more or less traditionally cooked recipe. I say more or less because I am not Italian and I have combined parts of quite some recipes I found and I altered them slightly. However, this is the best risotto I have ever tried, and the stirring doesn’t make me avoid cooking it on a regular basis!

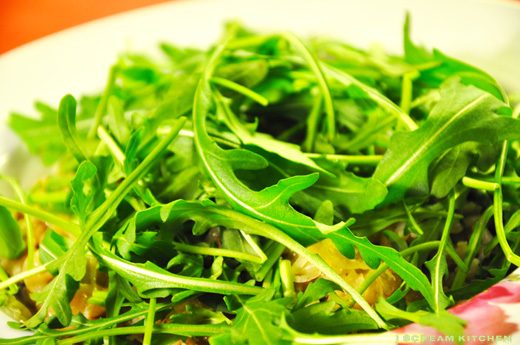
Mushroom risotto with loads of rucula on top

The real mushroom risotto recipe

(serves 3 - 4 if eaten as a main)

2-4 tbsp. olive oil
500-800 g (1-1.8 lbs) Portobello/chestnut/button mushrooms or a mix (the more you put the more mushroomy it is but 500 g is also OK) – thinly sliced
1 large onion – chopped
1 large clove of garlic - chopped
300 g (0.7 lbs) Arborio rice (or another branded as risotto rice)
½ cup dry white wine
1 L (34 oz.) hot stock (chicken, veggie, mushroom, etc.)
50 g (0.1 lbs) butter
Salt to taste
Fresh ground black pepper
Freshly grated parmesan (Don’t you dare use those powdered ones! Better skip it if you don’t have it, or use another type of mature cheese)
Fresh chives to taste (optional)
Fresh rucula/arugula to taste (optional)

Preparation:

1. Heat up a large pan or skillet to medium high and fry off the mushrooms in a little bit of the olive oil. Don’t cram them or they will be slimy in the end. You must have only 1 layer of mushrooms in your pan, if you have more just fry them of in a couple of batches. This is important! You are looking for light golden brown colour on the mushrooms, they shouldn’t be looking like boiled but they shouldn’t be all crisped up either. This usually takes about 5-10 min per batch. Set them aside.

2. You can use the same pan you used for the mushrooms. Heat up some more olive oil over medium high heat and add the chopped onion and garlic. Cook a couple of minutes until they turn transparent.

3. Add the well washed rice (wash it with cold water until the water is no longer milky looking, or your risotto will be gluggy) and fry along for a couple of minutes until a little transparent.

4. Add the wine and leave evaporate.

5. Here is the tiresome part of the recipe. Add a ladle of the hot stock (if you made it with a cube, don’t add any salt until the last minute after trying the dish as cubed and powdered stock are usually really high on salt) and let almost evaporate while gently stirring with a spatula. If you don’t know what you a looking for, it’s should look a bit like thick porridge before you add another ladle. Proceed like that ladle by ladle (your ladle should be around ½ cup) until you finish your stock. When you do try if you are content with the texture of the rice, ideally it shouldn’t be too soft, with a little bit of bite but definitely you shouldn’t be feeling like you are eating raw rice. If it’s not done yet, continue the same way, ladle by ladle while gently stirring with hot water until you’re happy with the result. The whole process usually takes between 20 – 30 minutes over medium high heat; make sure it’s not too high or your risotto might burn or you might need a lot more liquid. The final consistency of the dish should be somewhat like porridge, not like a big sticky lump but also not soupy. Have in mind that when you add the cheese in the end the risotto will get a little thicker, also those several minutes it takes to serve will make the rice suck up some more liquid.

6. Add the butter and let it melt in. The quantity might look a bit excessive, but it makes the risotto a lot more flavourful and smooth, don’t skip on it! Then add salt to taste (it might not need it) and freshly ground pepper.

7. Sprinkle with freshly grated parmesan and some chives and rucula. I like a lot of rucula, as it gives the dish a little spicy note but if you’re not a fan, just leave it out. Buon Appetito!


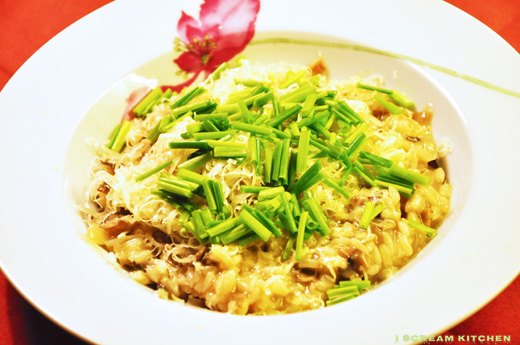
Mushroom risotto with chives

0 comments:

Sunday 17 March 2013

Roasted Zucchini/Courgette Balls Bulgarian Style

I am of the definite opinion that the zucchini are amongst the most wrongfully neglected vegetables in most western kitchens. Many find them tasteless or slimy, or just gross. Not once or twice, have I noticed friends of mine pushing them aside to the rim of their plates with a grossed-out facial expressions. I have to say, when I was younger, I was definitely not a fan either! However, the thing with zucchini is that they contain loads of water and if prepared wrong they can indeed be rather slimy. So, the way I like them is when they are a bit crispier and the recipe I am sharing with you today is an amazing way to add some healthiness to your weekly meals.

I admit, I am a convinced carnivore and I would usually really miss the presence of meat at the table (don’t let me begin what kind of a failure my fasting attempts were… why do I even try?!); however, this is one of the rare vegetarian recipes, where I feel that nothing is missing. So, that’s, also, a great one to make when you have some vegetarian guests and you don’t want to either cook 2 meals, or suffer with a tasteless soy dish. It is really wholesome and is bang full of flavor! Let’s not even mention how good from a diet point of view it is, especially if you go for a low fat option on the dairy products. I am absolutely addicted to it, especially when the weather gets a bit warmer, as it’s really nice and light. You don’t feel like a sweaty pig after dinner in the summer. I am generally a fan of yoghurt-based veg dishes in the spring and summer as it adds freshness. The only thing I have found with those is that that, even though they are super easy to prepare, they usually take some time, so if you like them as much as I do, you can make a huge batch and pop some in the freezer. I use my zucchini balls as a substitute for all those frozen potato and other similar pre-made things you usually have to fry, and I have to say the zucchini dish is just as satisfying even when you’re hung-over. Without any further ado, here’s the recipe and do let me know if you decide to make it yourselves or it sounds cool to you.


Roasted zucchini balls with yoghurt sauce... and my messy room as a background

Zucchini balls recipe:

(For 3-4 people)

For the balls:

1.5 kg (3.3 lbs) zucchini (baby marrow, courgette)
½  cup finely chopped fresh dill
3 spring onions, finely chopped
2 eggs
½ cup dry bread crumbs
200 g (0.45 lbs) white brine cheese/feta crumbled up
Salt

For the yoghurt sauce:

400-500 ml (14-17 oz) Bulgarian/Greek style yoghurt (should not be sweet tasting, rather either the creamy or the more sour type)
2 crushed garlic cloves
½  cup finely chopped fresh dill (if you don’t have it, don’t substitute with dried)
Salt


Preparation:

1. Heat up the oven to 225-250 C/ 440-480 F.

2. Peel the zucchini and grate them on the smallest setting of your grater. Put them in a sieve or colander and sprinkle them with salt, so that the moisture would be drawn out of the vegetable. If you don’t have either, you can put some kitchen paper under the grated zucchini, so it can suck up all the water. Set aside.

3. Mix all the products for the sauce and set aside, so the garlic can make the mixture more aromatic.

4. Get rid of the residual moisture from the zucchini. You can either squeeze it out by hand or through a muslin cloth, but make sure you leave no water in whatsoever! Otherwise, the dish will be slimy. Nobody likes a slimy ball!

5. Mix the squeezed-out zucchini with the rest of the products for the balls, form little…well balls (better be flat so they bake faster) and bake for 30-45 minutes in a baking tray laid with baking paper (no fat is needed here) until golden.

6. Serve with the sauce. They are actually really good cold, as well. You can also freeze them (without the sauce) and when you want to have them just defrost them and pop them in the oven till warm.
Zucchini balls, roasted

Zucchini balls with sauce on top


0 comments: