Honey Holiday Cookies
I am not the biggest fan of gingerbread;
instead, since I was rather young, I make those honey cookies for Christmas and
New Year’s. They are rather similar to gingerbread ones in that you can mold
the dough the same way. However, this one is not that sharp and spicy, but
rather mild honey-cinnamon-like (big surprise there!). I like to dunk mine in
my milk or pumpkin spice latte. This
recipe makes for a huge amount; I couldn't count them as the elves were
continuously eating them before I took all the batches from the oven.
 |
| Decorated honey cookies |
Honey holiday
cookies recipe:
2 tbsp.
honey
1 tsp.
baking soda
2 eggs
1 cup
caster sugar
1 cup
sunflower seed oil
700-900 g/25-32
oz flour
2 tbsp.
powdered cinnamon
Preparation:
1. Heat the
oven to 200C/390F.
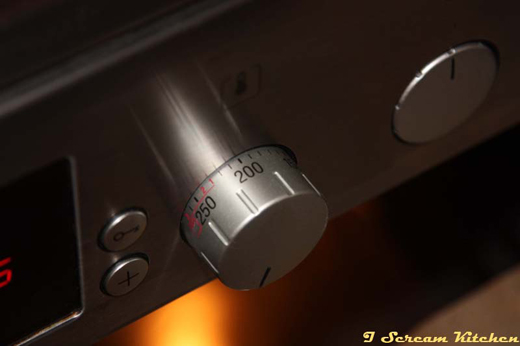 |
| Proof of temperature choice :D |
2. Mix well
the honey with the baking soda in a small bowl or cup until it gets pasty.
 |
| Honey and baking soda mix |
3. Mix the eggs with the sugar until fluffy
(preferably with a mixer), add the soda and honey paste; then slowly while
mixing pour the oil little by little. Next, slowly start adding the flour and cinnamon while
mixing. It depends on the brand how much flour you need, could be different
every time. You might need to switch to the spiral looking whisks of your mixer
and even start mixing with a big wooden spoon as the dough gets tougher. By the
end you’ll need to knead it to incorporate the last bits of flower. It is
important that you don’t overwork the dough as it will get too tough and the
cookies will be too hard to bite on. The consistency of the dough you are
looking for is play-doh like, it shouldn't be neither sticky (you won’t be able
to cut it) nor too hard.
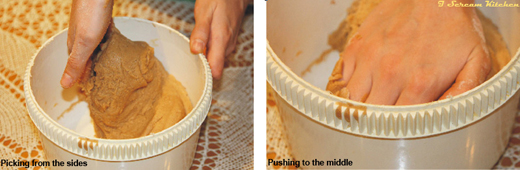 |
| How to knead |
4. If you don’t have a rolling pin and cookie
cutters or you just don’t feel like all the hassle, you could make little balls
out of the dough and bake them like that. Otherwise, flour your clean smooth
surface (table) very well and flatten the dough on top. Sprinkle some flower on
top of it and on your rolling pin so the dough doesn’t stick (do that every
time the dough gets sticky) and start rolling from the middle out on all sides
(vertically, horizontally, diagonally). The easiest way for me to roll (with a
normal rolling pin like the one on the pictures) is to have my hands in the
middle of the pin and slide them to the sides as I roll. Make sure the dough is
the same thickness everywhere or some parts of the cookies will burn and others
will be raw. You are looking for 0.5 cm/0.2 inches thickness.
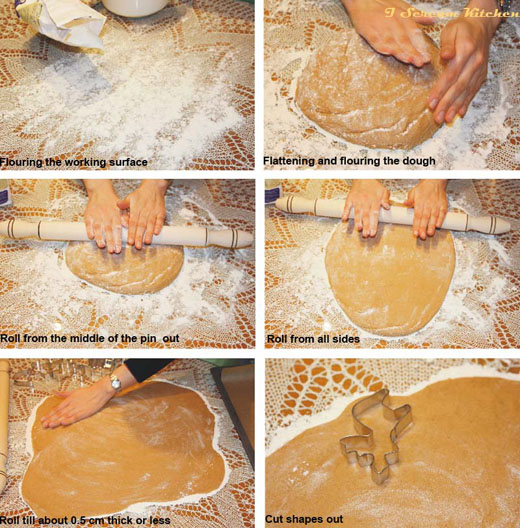 |
| How to roll |
5. Sprinkle some more flower on top and smooth
it with your hands. Now, you can cut out your shapes. If you don’t have cookie
cutters, you can use glasses that have thin rims. This way you can make
circles, crescents and all sorts of variations. A cute idea is to cut a little
rectangular shape at the bottom of your cookie, so you can
hang it on the rim of your coffee cup. Once you’ve cut your shapes,
just re-knead your dough and roll it again, until finished. Don’t forget to
flower the table or working surface, otherwise you won’t be able to remove your
shapes from it.
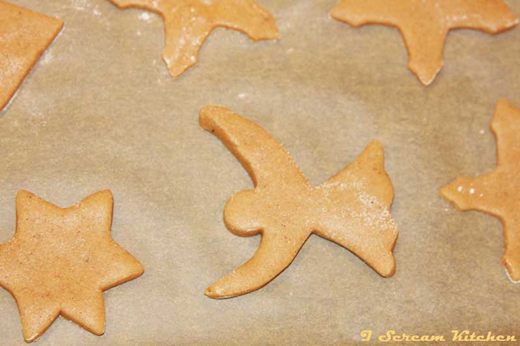 |
| Not yet baked cookies |
6. Put your unbaked cookies on some baking
paper-laid baking tray (if you don’t have baking paper just oil and flour the
tray) and bake for between 5-10 min depending on the thickness of your dough.
You are looking for golden brown.
7. Decorate your cookies if you like. You can
sprinkle them with powdered sugar; stick them together with butter cream, chocolate,
jam, etc. I went for encasing them with marzipan, which I coloured and rolled
and decorated them further with icing. I used Dr. Oetker for all the
decorations.
 |
| Honey Cookies |
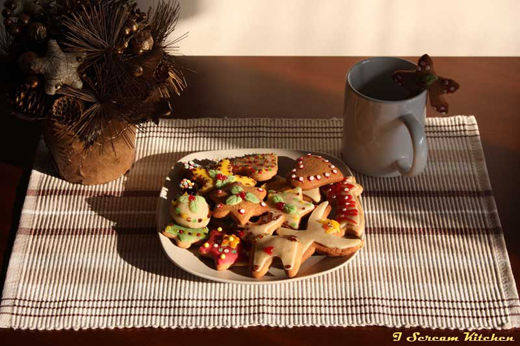 |
| The ready cookies |
By the way, look at these crazy old scales I found in my apartment! Funny huh! Next to them is the recipe for the cookies; love it when they looked all loved and used!
Would you make these lovely cookies at home?
Home-Made Pumpkin Spice Latte/ Hot Chocolate
 |
| Pumpkin Spice Latte |
Every fall a certain coffee shop chain comes up
with the awesome pumpkin spice latte and I marvel at how expensive it is! I
absolutely love it and I want to have it all the time, so I decided to make my
own, which is loads cheaper, I know exactly what goes into it and is quite easy
to make. I like making a big batch of the pumpkin spice milk enough for around
5 servings and I keep it in the fridge, so I can just warm it up and add it to
my coffee when needed. It keeps for quite long, almost for a week, depending on
what type of milk you use. If you don’t like coffee, you could turn it into a
pumpkin spice hot chocolate by adding Nutella, or some ground chocolate (white,
milk and dark work great) instead of the coffee. Just don’t forget to adjust
the amount of sugar you put as chocolate already has quite some sugar in it.
If you want to go in for the kill, you can make
it into a mocha if you have both chocolate and coffee. Conversely, if you can’t
find pumpkin/ pumpkin puree, skip it and you have yourself gingerbread latte.
Anyway, enjoy it with some home-made cookies! J
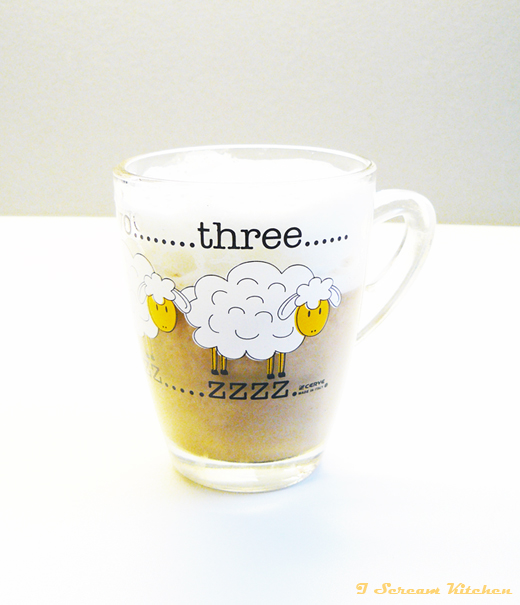 |
| Pumpkin Spice Latte |
Home-made pumpkin
spice latte/ hot chocolate recipe
(makes 5)
4 cups milk +
some for frothing (optional) – I used 3.5% but you could use any kind,
including soy, rice, etc.
1 tsp.
cinnamon
1 tsp.
dried ginger
¼ tsp.
nutmeg
¼ tsp. powdered
cloves
1 tsp.
vanilla extract/ a couple of drops vanilla flavouring
8 tbsp.
pumpkin puree (or butternut squash) - check out how to make it here.
5 shots of
coffee or 5 tbsp. Nutella (if you are an instant coffee fan, you can use that
instead)
Sugar to
taste
Whipped
cream (optional)
Preparation:
1. Pour the milk, spices, sugar, pumpkin puree
and nutella (if you’re going for a hot chocolate version) in a pot and bring almost
to a boil over medium high heat, while stirring constantly.
2. Sieve if you want the latte to be super
smooth.
3. Pour a shot of hot coffee (if gone for the
actual latte version) and then pour some of the pumpkin spice milk, leaving a
little space for the topping, if you’d like some.
4. Make the topping of your choice. I have 3
offers. Either froth some of the pumpkin spice milk, normal milk, or top with
some whipped cream. If you decide for the pumpkin spice milk, it will be
orange-brown. If you have a milk frother, you can froth your drink up straight
in the cup you are serving it. If you are going for the milk version, froth it
up in a separate cup and spoon the froth on top. If you don’t have a frother,
you can use a stick blender; just have the liquid that’s being frothed up be
the same temperature as the other parts of the drink (almost boiling). Also,
you could top your pumpkin spice drink with some marshmallows, smarties or
powdered cinnamon.
5. Serve with some cookies!
Would you make these lovely cookies at home?
Chunky Oatmeal Cookie Magic
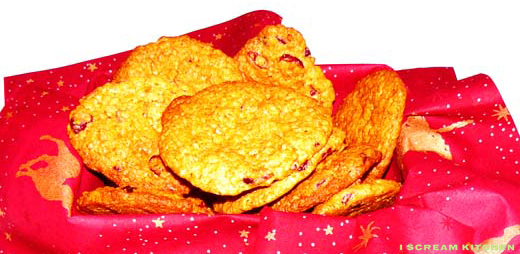 |
| Oatmeal cookies |
Christmas time is also cookie time for me (this
may or may not be linked to the arrival and welcoming of Santa with cookies and
milk…) and I have 2 favourite kinds, this oatmeal kind and the soon-to-come
honey cookies. These oatmeal ones are delicious and chunky and perfect for
before bed with a glass of milk or for breakfast.
When I was a kid I got a recipe for those
cookies and I quite liked it, so decided to make them again; however, once I
started making them, I realized that I was missing a lot of the elements, so I
substituted them with what I had on hand. The new cookies were amazing! So much
better than the original! Unfortunately, I had forgotten what and how much of
each ingredient I had used. So, for years, I was trying to remember and I
believe I finally made them the way they accidentally had turned out.
I made those last week for some friends and
classmates, and two girls from my class claimed that I should start selling
them, as they were utterly delicious. So, if you don’t want to wait for the
I-Scream-Kitchen-branded cookie line, the recipe is below!J Also, they are super easy to make
if I could pull them off when I was around 8-10!
 |
| Oatmeal cookies |
Oatmeal
cookies recipe
(makes 18
cookies)
3/4 cup
brown sugar – I used demerara
100 g/3.5
oz softened butter
1 large egg
1 tsp.
vanilla extract/a couple of drops of vanilla flavouring
1 tbsp.
milk
1 cup flour
½ tsp.
baking soda
½ tsp.
baking powder
½ tsp. salt
1.25 cup chunky
oatmeal
½ tsp.
cinnamon
100 g dried
cranberries/ dried cherries/raisins
1 tsp. lemon
rind
Preparation:
1. Set the
oven to 180 C/ 355 F. Mix the butter and sugar well, until creamy. Then add the
egg, vanilla and milk and mix until homogenous. No need to use a mixer, you can
use a fork instead.
2. Slowly
add the flower, baking soda, baking powder and salt, while mixing.
3. Add the
oatmeal, cinnamon, dried fruit and lemon rind and mix well.
4. Put some
baking paper on a baking tray (if you don’t have baking paper, butter the tray
and cover with a dusting of flour) and put a tablespoonful of the mixture per
cookie. Set the cookies at least 7 cm/ 3 inches away from each other, so they
don’t become one big cookie. You don’t need to worry about the shape as they will
start looking more like cookies rather than wet blobs as they bake.
5. Bake for
10-15 minutes, or until golden brown. You will probably need to bake in 2 go’s
unless your oven is quite big.
If you are
not a fan of the old cookie and milk combo, next recipe is a pumpkin spice
latte one, that would be perfect to go with any cookies.
Would you make those at home?
Delicious Roast Turkey with Sarma-Wrap Stuffing + Sweet Potato Mash
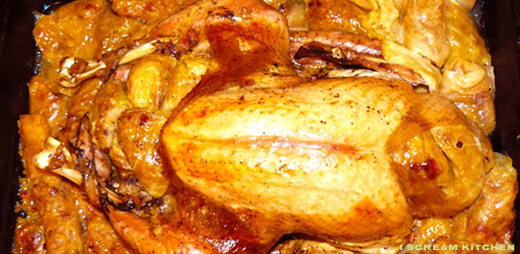 |
| The victim |
Turkey time is the most wonderful time of the
year! My mouth waters just by the thought of it! Preparing a roast turkey
dinner is a whole-day job but it is definitely worth it. The recipe I’m sharing
is quite close to my heart as it is the one my mom makes for Christmas or New Year’s
Eve. I believe one year, as a child, I requested it for both holidays, that’s
how good it is!
This turkey is roasted with the stuffing inside
and around it. The stuffing is a special rice and sour kraut sarma wrap
stuffing. Sarma is a savoury Balkan dish, made of (in this case) sour kraut
leaf rolled around a filling. The sour kraut makes the turkey incredibly juicy
and tender, and conversely, the turkey infuses its juices into the wraps,
making them irresistible and moreish.
If you can’t bother to make the sarma wraps or
you can’t find sour kraut leaves, you can just stuff the turkey with the rice
stuffing and put sour kraut on top of the bird. But if you have the opportunity,
I would definitely advise you to make the sarmas.
I made this as a Christmas dinner for some of
my friends last week, who loved it. Nothing was left! My New Orleanian friend even
grabbed the bones to make some gumbo J
So, if you feel like something extra special
this holiday season, definitely give this a try! I made some sweet potato mash
to go with it, whose recipe you can find below after the turkey’s.
 |
| Delicious Roast Turkey with Sarma-Wrap Stuffing |
Roast
Turkey Dinner with Sarma Wraps Stuffing
(Serves 6)
2.6 kg/5.7 lbs.
turkey (with giblets if possible)
1 cup
regular plain white rice
2 onions,
chopped
200 g/7 oz.
diced smoked bacon
Small
handful of raisins
1 head of
sour kraut (we need the leaves)/ around 400 g sliced sour kraut
2.5 cups
stock (I used beef)
2 tbsp.
olive oil
4 tbsp.
butter + extra for buttering the bird
Black
pepper
Paprika
powder
1 cup water
Big needle
and thick thread
Deep
roasting tray
Preparation:
1. Remove giblets and neck from the cavity if
there are any and wash the bird very well with cold water from inside and out.
2. Chop the giblets and fry them in a big
frying pan in the oil and 2 tbsp. butter for 2-3 minutes at medium high heat,
until they change colour. Don’t overcook them, or they will get too rubbery.
Remove them and put them aside.
3. Fry off the onions for a couple of minutes
until they get transparent; then, add the bacon. Fry for a couple more minutes
and add the well-washed rice. Cook until the rice starts getting transparent.
Stir regularly, so the pan doesn’t catch.
4. Add back the giblets, the raisins and the
stock in the pan and as soon as the stock starts boiling, turn to low heat.
Also, pop in some black pepper and paprika to taste. Cook for around 20 minutes
under a lid until rice is almost done, just a little al dente. If you can’t
tell, better cook it fully than undercooking it as sour kraut would prevent it
from cooking further. If you have electric stove tops (as opposed to gas ones)
you can switch them off fully and let the rice cook from the residual heat, but
in that case, don’t open the lid for the whole 20 minutes, as you don’t want
the heat to escape.
5. Butter the turkey with soft butter and salt
and pepper it from inside and out.
6. Remove the centre tough part of each kraut
leaf if you are going for the stuffed sarma wrap option. This will leave you
with two halves of the leaf. Place the leaf half on your palm and put about a
teaspoonful of rice on the upper middle part of the leaf, leaving a little
buffer. Fold the upper part of the leaf over the stuffing, then fold the 2 sides
in and roll until you get a nice tight wrap. If rice starts pouring over from
the sides, that means you’ve put too much rice for that size leaf.
Leave 5-6 leaves out, unstuffed.
Don’t wash the pan you made the stuffing in,
just yet!
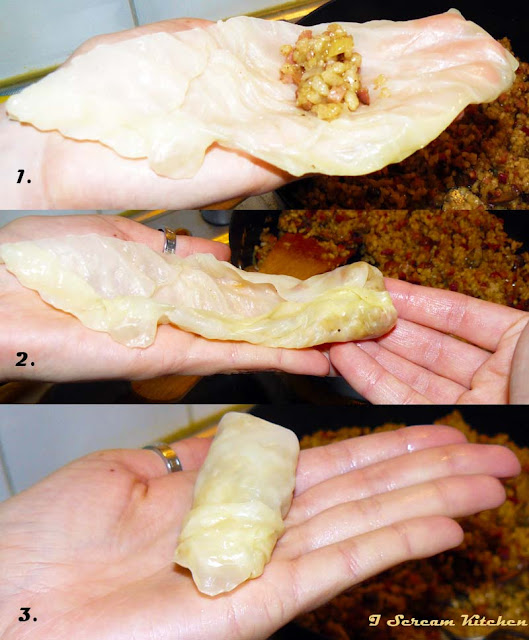 |
| Sarma Making in Action |
7. Stuff the turkey tightly with the wraps, once
you’ve made all of them. I stuffed the neck part, as well.
If you chose to go for no sarma wraps, stuff
the turkey with the rice tightly.
Sew the cavity and the neck of the turkey
closed, so the stuffing can stay nicely inside and preserve all its juices.
Arrange the leftover stuffing (rice or sarma
wraps) around the turkey in the roasting tray. Put the neck in, as well.
If you went for no wraps spread half of the
sliced sour kraut over the outside rice.
8. Melt the leftover 2 tbsp. butter in the pan
you made the rice stuffing in. Let it get golden. Pour it over the turkey and
the sarma wraps.
9. Cover the turkey well with the leftover sour
kraut. This will make the meat juicier and more tender.
 |
| Stuffed, sewn and covered turkey, ready to roast |
10. Boil the cup of water in the same pan you
made the rice and melted the butter in and make sure you grab all the little
leftover pieces of stuffing. Pour it over the outer stuffing.
11. Wrap the turkey and the stuffing with aluminium
foil.
12. Roast the turkey in a preheated to maximum
oven. Once you hear the water boiling from under the foil, turn the temperature
down to around 200 C/390 F so it keeps boiling. For every kilo/2.2 pounds of
turkey allow for 1 ¼ hours of overall roasting. If you’d like the turkey to
colour on top, remove the foil and the sour kraut covering the turkey for the
last hour of roasting and bathe the bird with the juices around it every 15 minutes.
However, if you don’t care for the colour, I would suggest roasting it under
the foil for the whole roasting time. This way, the bird will stay pale, but it
will be extremely juicy and even more delicious.
13. Serve the turkey with the sarma wraps on
the side. I made some sweet potato mash, steamed green beans and served with
some gravy and cranberry sauce.
Here is the recipe for the sweet potato mash. Sorry that the picture quality is a little crummy but we were getting pretty hungry!
 |
| Sweet Potato Mash |
Sweet
potato mash
1300 g/3 lbs.
sweet potatoes (peeled and chopped in stripes)
200 ml/7
oz. cream
6 tbsp.
unsalted butter
1 tbsp.
sugar
Salt to
taste
Preparation:
Put all the ingredients in a pot and bring to
the boil over medium high heat. Once it starts boiling, lower the heat to “low”
and boil under a lid for about 30-45 minutes or until the potatoes start
falling apart. Stir occasionally. When ready, mash with a potato masher or a hand
mixer. If you want it super smooth and lumpless, pass it through a drum sieve,
but I find it way more charming if it’s a bit rougher.
Would you make this at home?
Holiday Double-Layer Pumpkin Cheesecake
 |
| Double-layered Pumpkin Cheesecake |
There is an abundance of pumpkins and butternut squashes (my personal favourites) in the fall/winter season and this year I
went all out on the pumpkin recipes. I love cheesecake and I make different
kinds quite often. I particularly like baked ones in the winter as they give
you that warm and fuzzy feeling that is usually reserved for your mum’s
cooking.
The recipe I’m sharing is for a double-layered
pumpkin cheesecake (half vanilla, half pumpkin pie flavour), which has a little
bit of a funny story behind it. I made this for dessert for a Halloween party
this year, but as I got a bit overzealous on the tequila, I might have ended up
in bed while my, also quite “spirited”, guests were nomming it up from the
baking tray, while standing up. They liked it quite a bit so I ended up making
it again and it’s quite a festive one to try out for the holidays, as it has
loads of wintery holiday-like spices in it.
I prefer making it with butternut squash
instead of with pumpkins as butternut squash is a lot more flavourful and a lot
sweeter. Actually, if you buy a canned pumpkin puree, it is usually indeed
butternut squash inside. However, I couldn't find a canned puree in my country,
so I made it myself (which is super easy) from an awesome fresh squash. Read on
for instructions.
I would suggest baking it in a spring form, so
you can put it in a serving dish later, if you’re making it for others.
Otherwise, you can use anything that is ovenproof. For this recipe, I used
individual cups.
Just have in mind that, even though the baking
takes only about 40 minutes, you have to allow for it to cool off for several
hours. So, prepare this a bit in advance, so it can set. If you make it in
individual cups, like me, you can pull it off with shorter cooling time, as you
eat it straight from the baking dish.
So there it is:
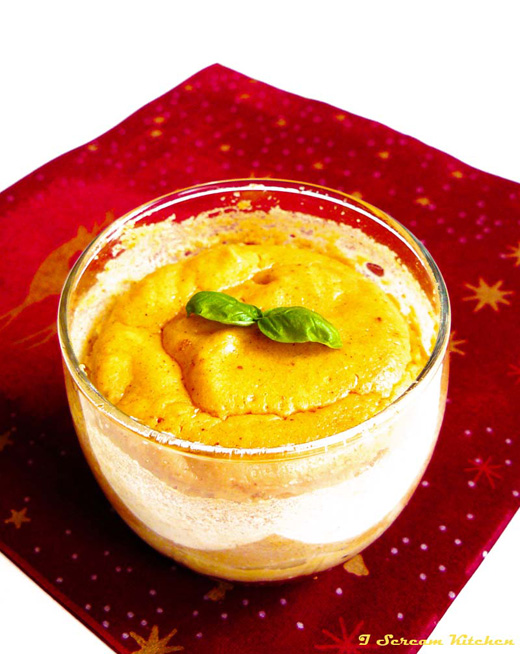 |
| Double-layered Pumpkin Cheesecake |
Pumpkin
Cheesecake
(serves
6-8)
600 g/ 21
ounces cream cheese
200 g/ 7
ounces Greek yoghurt
2 large
eggs
Several
drops vanilla flavouring
1 tsp.
lemon rind (optional)
½ cup
caster sugar
½ cup
pumpkin puree (about 200 g pumpkin or butternut squash)
1 tsp.
ground cinnamon
1 tsp.
ground ginger
¼ tsp.
ground cloves
¼ tsp.
ground nutmeg
2 tbsp.
soft butter
200 g/ 7
ounces whole-grain biscuits/crackers (the crunchier, the better)
Preparation:
1. Crush the biscuits/crackers in a blender. I
had no blender, so I put them in a plastic bag, wrapped the bag in a towel and
hit them with a thick glass bottle until they got powdery (use a rolling pin,
if you have one, instead). This is great for anger management…
Preheat the oven to 160 C/320 F.
2. Melt the butter and pour it over the crushed
biscuits/crackers and mix them well. Put the mixture in the baking tray you
will be using to bake the cheesecake in. Press the mixture well with your
fingers so it sticks to the bottom and put the tray in the fridge so it
hardens.
3. Mix cream cheese, yoghurt, eggs, sugar, vanilla
and lemon rind with a mixer until fluffy. Don’t leave any lumps.
4. Spread about half the mixture over the
hardened biscuit/cracker crust.
5. Add the pumpkin puree and the spices to the
leftover cream cheese mixture and mix well.
If you don’t have pumpkin puree, like me, clean
and peel some pumpkin (better butternut squash, as it is sweeter), chop it in
small pieces and put it in the microwave with the tiniest amount of water in a
microwaveable dish with a lid for about 8-10 minutes. Remove the leftover water
and blend well with a stick blender, or whatever blending kitchen appliance you
have. If you don’t have one, pass the boiled pumpkin through a sieve or a
muslin cloth.
6. Spread the pumpkin cream cheese mixture over
the white one and put in the oven for about 40 minutes. Then, switch off the
oven and let the cheesecake sit for at least 30 more minutes in the switched-off
oven (the oven door slightly open). If you have more time just leave it in
until the oven completely cools off. To lower the chances of the cake cracking,
run a knife on the edges of the cake so they separate from the baking dish. Next,
take the cheesecake out and let it cool slowly first and then, put it in the
fridge, covered with some cling film.
7. Serve completely cold. You can add some
whipped cream. Bon appetit!
Would you make this at home?
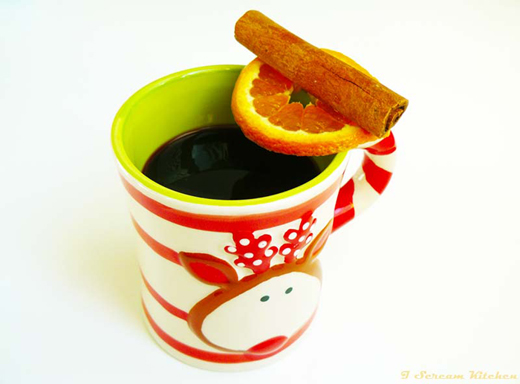
Mulled Wine (Glühwein)
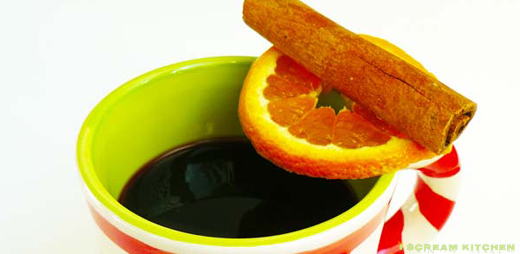 |
| Mulled Wine |
The first thing I get excited about, once it
hits December, is definitely the Christmas markets. Here in Austria, they are
quite the deal and are surely worth seeing with their majestic decorations,
purely oozing Christmas spirit. But… let’s face it! The best thing about them
is grabbing a cup of mulled wine (Glühwein) to keep you warm (and boozy) while
chatting to your buds in the festive atmosphere. Every mulled wine stand has
its own recipe and so do I. I love making it at home as I usually find the ready-made mixes tasteless and most of the stands’ either too sugary or too low
quality.
 |
| Mulled Wine |
As I love Christmas and everything around it,
and I was particularly lacking festive spirit due to the lack of snow a year or
two ago, I spent a couple of cold December evenings trying to develop the best
(in my humble opinion) mulled wine out there. Let me just say that after the 3rd
batch it gets more and more difficult to restrain yourself from singing
Christmas songs out loud through your window. However, it was totally
worth it! If you want to give it a whirl yourself, read on for the recipe:
Mulled wine/ Glühwein recipe
1 bottle (750 ml) of dry red wine (I
quite like Syrah/Shiraz)
¼ cup sugar
1 ½ cup water
½ lemon – sliced (or other citrus
fruit)
2 cinnamon sticks (or 1 tsp. of
powdered cinnamon)
3 cloves
½ l orange juice
1 bag of fruit tea (berries or
apples work best)
1 shot rum
per cup (optional, I personally don’t put it in)
Preparation:
Mix all the ingredients but the rum and the
lemon in a pot and put over medium high heat and stir well, so all the sugar dissolves
perfectly. Bring almost to the boil; if it starts actually boiling, the alcohol
evaporates. Sieve the liquid if you used powdered cinnamon; otherwise, fish out
the cinnamon sticks, cloves and tea bag. (You can, also, put all the dry
ingredients in a muslin cloth before you put them in the liquid, so it’s easy to
remove them afterwards.) Pour in cups, put some lemon slices in and add the
shot of rum. I find it tastier without rum, but, I believe, the classic recipes
always feature it.
So, there you go, if that doesn’t cheer you up,
I don’t know what will! ;)
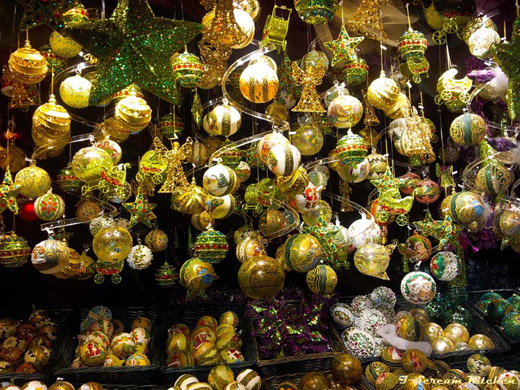 |
| Rathaus Christmas Market, Vienna, Austria |
Would you make this at home?


0 comments: